
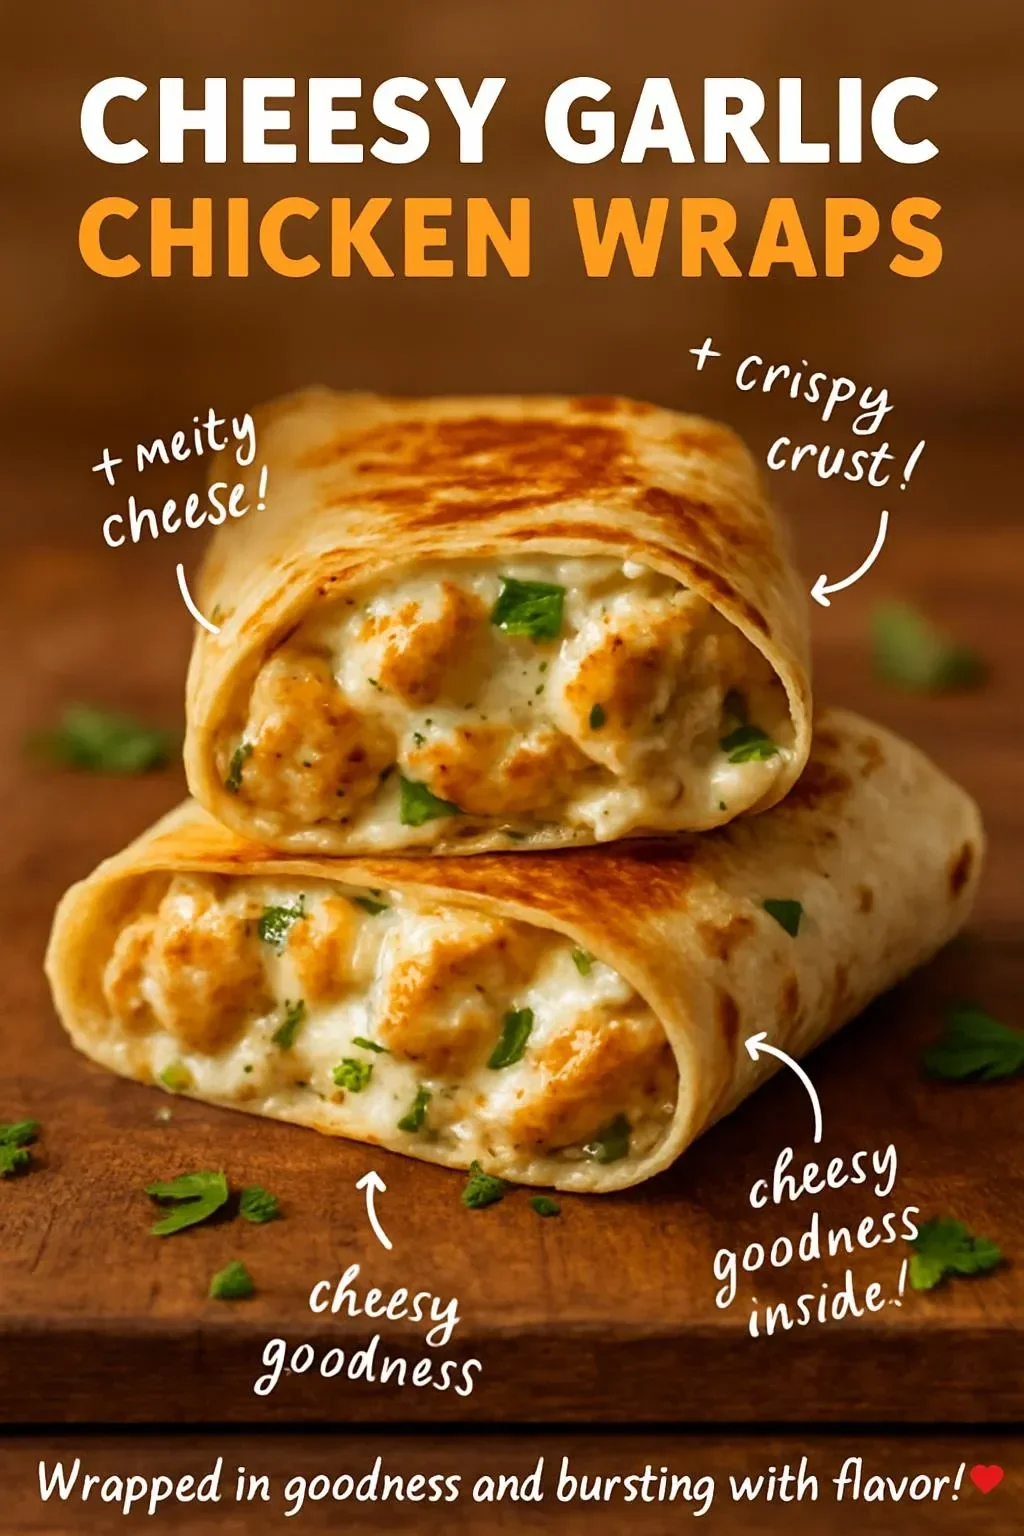
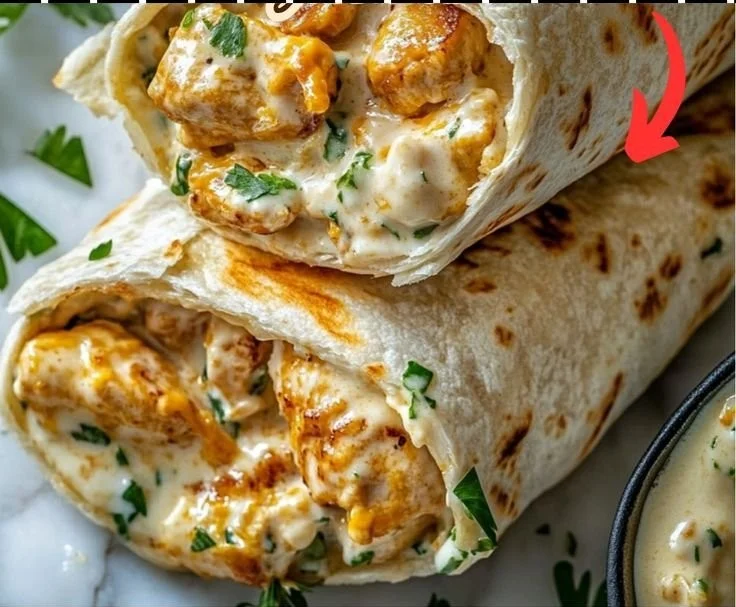
Cheesy Garlic Chicken Wraps are the kind of meal that brings a big smile to your face — hearty, flavorful, and comforting all in one bite. Perfect for busy weeknights or casual gatherings, these wraps marry the rich taste of cheesy goodness with zesty garlic aioli. It’s a family-approved dish that means dinner is sorted and everybody goes home happy. Plus, they’re quick to whip up, giving you more time to kick back and enjoy the evening.
Why You’ll Love This Dish
This recipe shines for so many reasons. First off, it’s incredibly quick to make, coming together in just about 20 minutes. Perfect for those nights when you’re juggling the kids’ activities or just plain exhausted after a long day. It’s also wallet-friendly, using simple ingredients that you probably already have in your pantry. And let’s not forget how cozy and comforting it is — who doesn’t love wrapping up tasty ingredients in a warm tortilla?
"These wraps are a game changer for our busy weeknights! My whole family devoured them — even the picky eater!" — A happy reader.
Step-by-Step Overview
Making Cheesy Garlic Chicken Wraps is as straightforward as it gets! You’ll be sautéing some shredded chicken with garlic aioli, melting cheese, and wrapping it all up in tortillas. Expect rich flavors with every bite, which will leave you and your family coming back for seconds.
{image_template}
What You’ll Need
Gather these items for your delightful wraps:
- 2 cups cooked chicken (shredded)
- 1/2 cup garlic aioli
- 1 cup cheddar cheese (shredded)
- 4 large tortillas
- Salt and pepper to taste
Feel free to substitute store-bought rotisserie chicken for the cooked chicken to save even more time. You can also try different kinds of cheese if you’re feeling a little adventurous!
Directions to Follow
Instructions:
- In a large mixing bowl, combine the shredded chicken and garlic aioli, making sure every piece is coated in that delicious garlicky goodness.
- Add in the shredded cheddar cheese and season with salt and pepper to taste. Mix everything well until combined.
- Lay out a tortilla on a flat surface. Spoon a generous amount of the chicken mixture onto the center of the tortilla.
- Fold the sides of the tortilla inwards and then roll it up from the bottom, securing the filling inside. Repeat this process with the remaining tortillas.
- Heat a skillet over medium heat and place the wraps seam-side down. Cook until the tortillas are golden and slightly crispy, about 3-4 minutes on each side.
- Once they’re golden, remove them from the pan and let them cool for a minute before slicing in half. Serve warm.
Best Ways to Enjoy It
Cheesy Garlic Chicken Wraps are delicious on their own but can be paired with various sides for an extra special touch. Serve them with a fresh garden salad, crispy potato wedges, or a side of marinara sauce for dipping. You could also sprinkle some chopped green onions or parsley on top for a pop of color.
Storage and Reheating Tips
Leftovers? No problem! These wraps store well in an airtight container in the fridge for up to 3 days. To reheat, place them in a skillet over low heat, flipping occasionally, until warmed through. If you’re thinking of freezing them, make sure they’re tightly wrapped in plastic wrap and then placed in a freezer-friendly bag. They’ll last for about three months in the freezer, but the sooner you eat them, the better!
Helpful Cooking Tips
- Use leftover chicken or rotisserie chicken for faster prep.
- Don’t skip the garlic aioli — it’s the secret to making these wraps sing with flavor.
- If you’re in a pinch, opt for flour tortillas, but corn tortillas would work too for a gluten-free alternative.
Recipe Variations
Feel like mixing things up? You can swap in different proteins like ground turkey or even beans for a vegetarian option. Try adding toppings like sliced avocado, fresh spinach, or roasted red peppers for an extra layer of taste. You can also use different cheeses like pepper jack for a spicy twist!
Common Questions
How long does it take to prepare these wraps?
From start to finish, you’re looking at around 20 minutes.
Can I use a store-bought garlic aioli?
Absolutely! Store-bought aioli can save you time while still delivering on flavor.
Are these wraps easy to freeze?
Yes! Wrap them tight in plastic wrap and store them in a freezer-safe bag for up to three months. Just remember to reheat them thoroughly.

With these Cheesy Garlic Chicken Wraps under your belt, you’re bound to turn any weeknight into a comforting family feast! Enjoy every mouthwatering bite!
PrintCheesy Garlic Chicken Wraps
Hearty and flavorful wraps filled with cheesy goodness and zesty garlic aioli, perfect for busy weeknights or casual gatherings.
- Prep Time: 10 minutes
- Cook Time: 10 minutes
- Total Time: 20 minutes
- Yield: 4 servings
- Category: Main Course
- Method: Sautéing
- Cuisine: American
- Diet: None
Ingredients
- 2 cups cooked chicken (shredded)
- 1/2 cup garlic aioli
- 1 cup cheddar cheese (shredded)
- 4 large tortillas
- Salt and pepper to taste
Instructions
- In a large mixing bowl, combine the shredded chicken and garlic aioli, making sure every piece is coated.
- Add in the shredded cheddar cheese and season with salt and pepper. Mix well until combined.
- Lay out a tortilla on a flat surface and spoon a generous amount of the chicken mixture onto the center.
- Fold the sides of the tortilla inwards and roll it up from the bottom, securing the filling inside. Repeat with the remaining tortillas.
- Heat a skillet over medium heat and place the wraps seam-side down. Cook until golden and slightly crispy, about 3-4 minutes on each side.
- Remove from the pan, let cool for a minute, and slice in half. Serve warm.
Notes
Feel free to substitute store-bought rotisserie chicken for the cooked chicken. Different cheeses can be used for variety.